Telling time is learned one small step at a time: first the hour, then half past, then quarters, then every five minutes. This guide follows those steps with real worksheets made with the free telling time worksheet generator, and gives a few tips that make the clock easier to read.
The steps, from o’clock to every minute
| Age | Times on the clocks | Help on the clock face |
|---|---|---|
| 5-6 | O’clock only | Minutes printed around the face |
| 6-7 | O’clock and half past | Minutes printed around the face |
| 7-8 | Quarter hours | Minutes printed around the face |
| 8-9 | 5-minute steps | Numbers 1 to 12 only |
| 9-10 | Any minute | Numbers 1 to 12 only |
| 10-11 | Any minute, plus a seconds hand | Numbers 1 to 12 only |
Step 1: read the clock
The first page shows clocks with boxes under them: the child writes the hour and the minutes. At ages 5-6 every clock shows an o’clock time, so the minute hand always points to 12 and the child only reads the short hand. Half past comes next, then quarter past and quarter to.
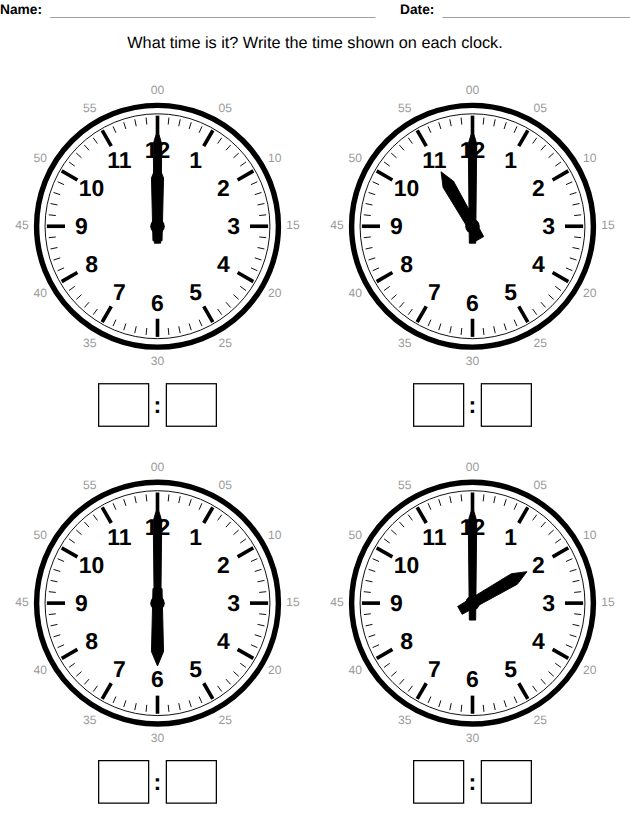
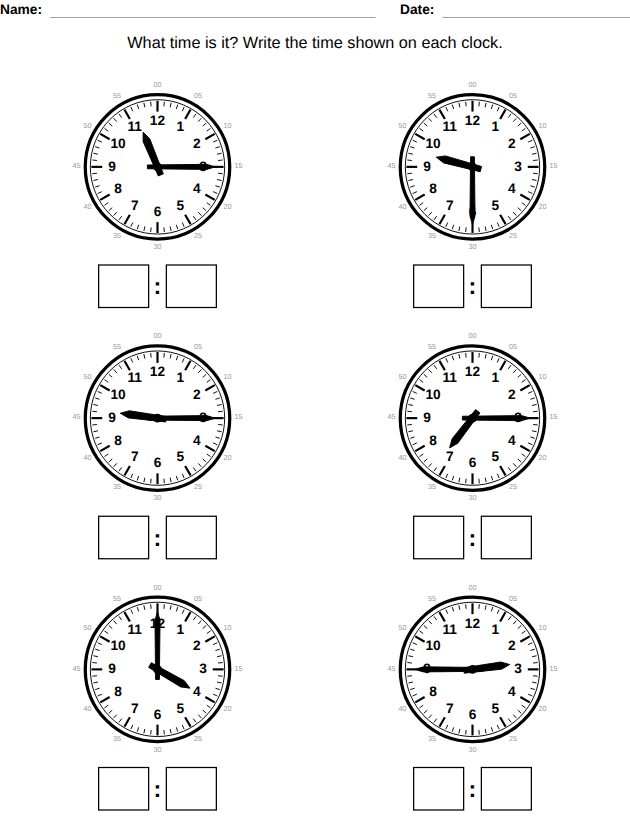
Up to ages 7-8, the minutes are printed around the clock face (5, 10, 15…). That small help removes the hardest part of the job, counting by fives, while the child learns where the hands point.
Step 2: draw the hands
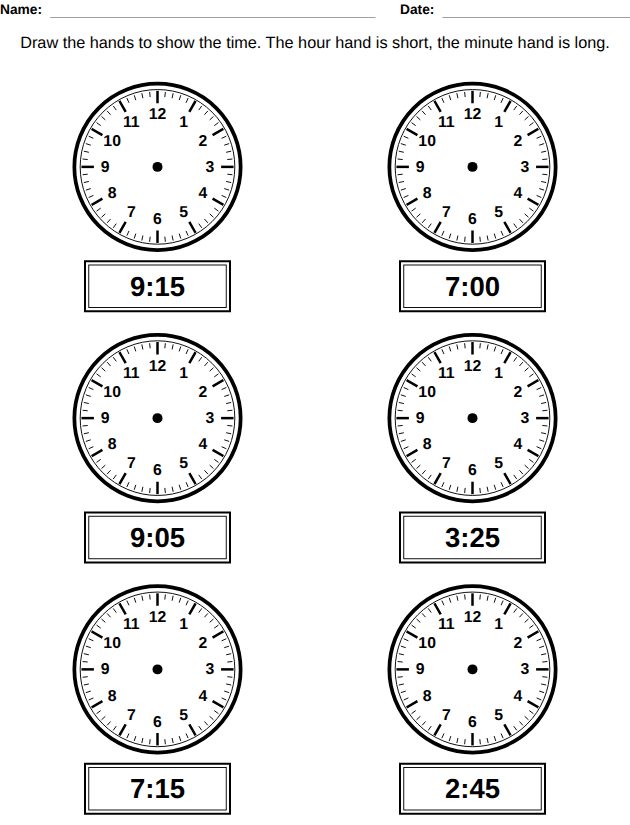
The opposite exercise checks that the child really understands the clock: the time is written under an empty face, and the child draws the two hands. The instruction reminds them that the hour hand is short and the minute hand is long. The times follow the same steps as the reading page.
Step 3: time in words and elapsed time
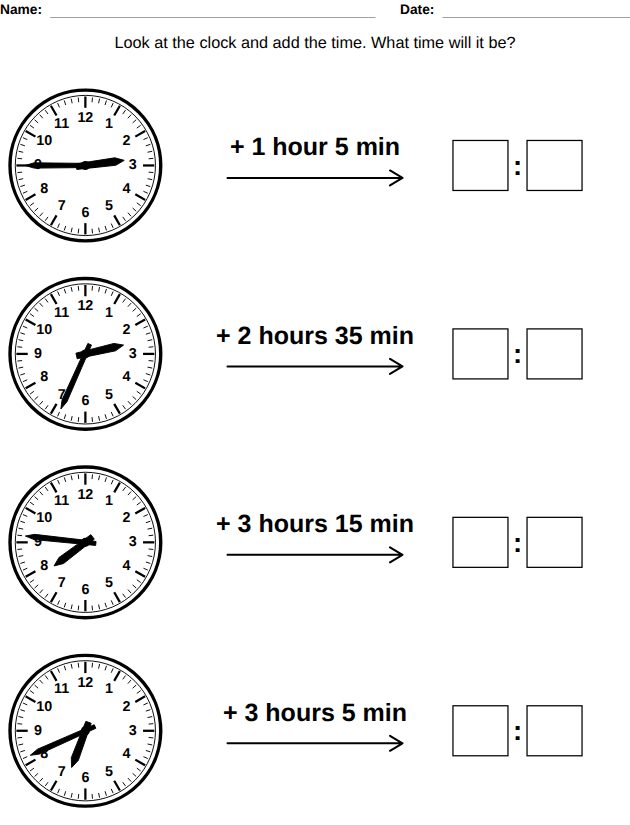
From ages 7-8 the child can write the time in words, such as “quarter past three”, then “ten to six” with 5-minute steps. Elapsed time comes at ages 8-9: each clock has a time to add, and the child writes the time it will be. The added time is whole and half hours at ages 8-9, 5-minute steps at 9-10, and any number of minutes at 10-11.
Tip
For elapsed time, add the hours first, then the minutes. Say the new time after each step.
Tips that help
Use a real clock next to the page
Move the hands of a toy clock or a wall clock to show each time of the worksheet before the child writes it.
Talk about the time during the day
“It is half past six, dinner time.” Linking a time to a moment of the day makes it easier to remember.
Move on when it is easy
When a level is done without mistakes, choose the next age in the generator. Each click on New worksheet gives other times. For a calendar page and clock matching, see how to make a telling time workbook.
Questions
At what age can a child read an analog clock?
The LogikLand worksheets start with o’clock times at ages 5-6 and add half past at 6-7, quarter hours at 7-8, 5-minute steps at 8-9 and any minute from ages 9-10. These ages are a guide: every child goes at their own pace.
Should I teach digital or analog time first?
The worksheets ask the child to write the time of an analog clock in digital boxes, so both are practised on the same page.
Do the worksheets use the 24-hour clock?
In English the clocks keep the 12-hour time, with AM and PM on the matching page from ages 9-10. In French, Spanish, German and Italian, the 24-hour clock is used from ages 9-10.
Is there an answer key?
Yes. The PDF of the free generator has two pages: the worksheet and its answers.
Related articles
- Free Math Worksheets for Kids by Age (4 to 11)
A level-by-level guide to kids math worksheets, from counting dots at age 4 to long division at age 11.
Sources
This article is based on LogikLand's own puzzle generators.
Want to make a whole kids workbook?
LogikLand makes complete educational workbooks for ages 3 to 11: math, telling time, handwriting, word games, colouring, money, logic and picture activities, with the answer key at the end. Commercial rights come with the PRO and EXPERT plans.
Related: All blog articles | Try the tool | More Kids worksheets articles